


Repair and Refurbish Manual
for
SINGER
SEWING MACHINES
of
Class 15
*********
Timing, Adjusting, Refurbishing, and Service/Repair
Instructions
and
Illustrations
*********
Repair and Refurbish Manual. (Photo 01)

This is NOT a standard "Xerox"
copy of the manual!
This manual s a
precisely scanned copy
of the original manual,
made with a
professional high-resolution scanner!
Description:
This listing is for a professional reproduction of the manual for “Repairing and Refurbishing Singer Sewing Machines of Class 15.” This is NOT a standard "Xerox" copy of the manual! It is professionally printed on the same heavy-weight pure-white chrome paper as the original manual! It is super clean, the text and the illustrations are very sharp, and it is nearly identical in size and in paper type to the original manual. This manual is not a bunch of pages stapled at the top corner. This manual is professionally bound, just like the original manual.
Manual is professionally bound. (photo 03)

***************
This manual is professionally bound,
just like the original Singer manual.
***************
Unlike the original old manual that has become frail, brittle, mildewed, stained and yellowed after so many years, this manual looks like an original manual that has been preserved in NEW CONDITION!
In fact, if we didn't tell you,
you could not tell the difference
between this manual and the
original manual!
This 40-page full-size Repair and Refurbish Manual is complete and very clean with no "black dots," smudges, stains, or any other imperfections. No pages are missing, dirty, or damaged.
The manual includes descriptions and illustrations which will show you how to do the following:
Identifying the Machine Model
Principal Parts of the Machine
Common Tools Used for Servicing, Repairing and Refurbishing the Machine
Materials and Spare Parts
Mechanism of the Sewing Machine, How Sewing Machines Work
Disassembling and Cleaning the Hand Wheel and Stop Motion Screw
Reassembling the Hand Wheel and Stop Motion Screw
Types and Function of Bobbin Winders
Disassembling, Repairing and Refurbishing the Bobbin Winder
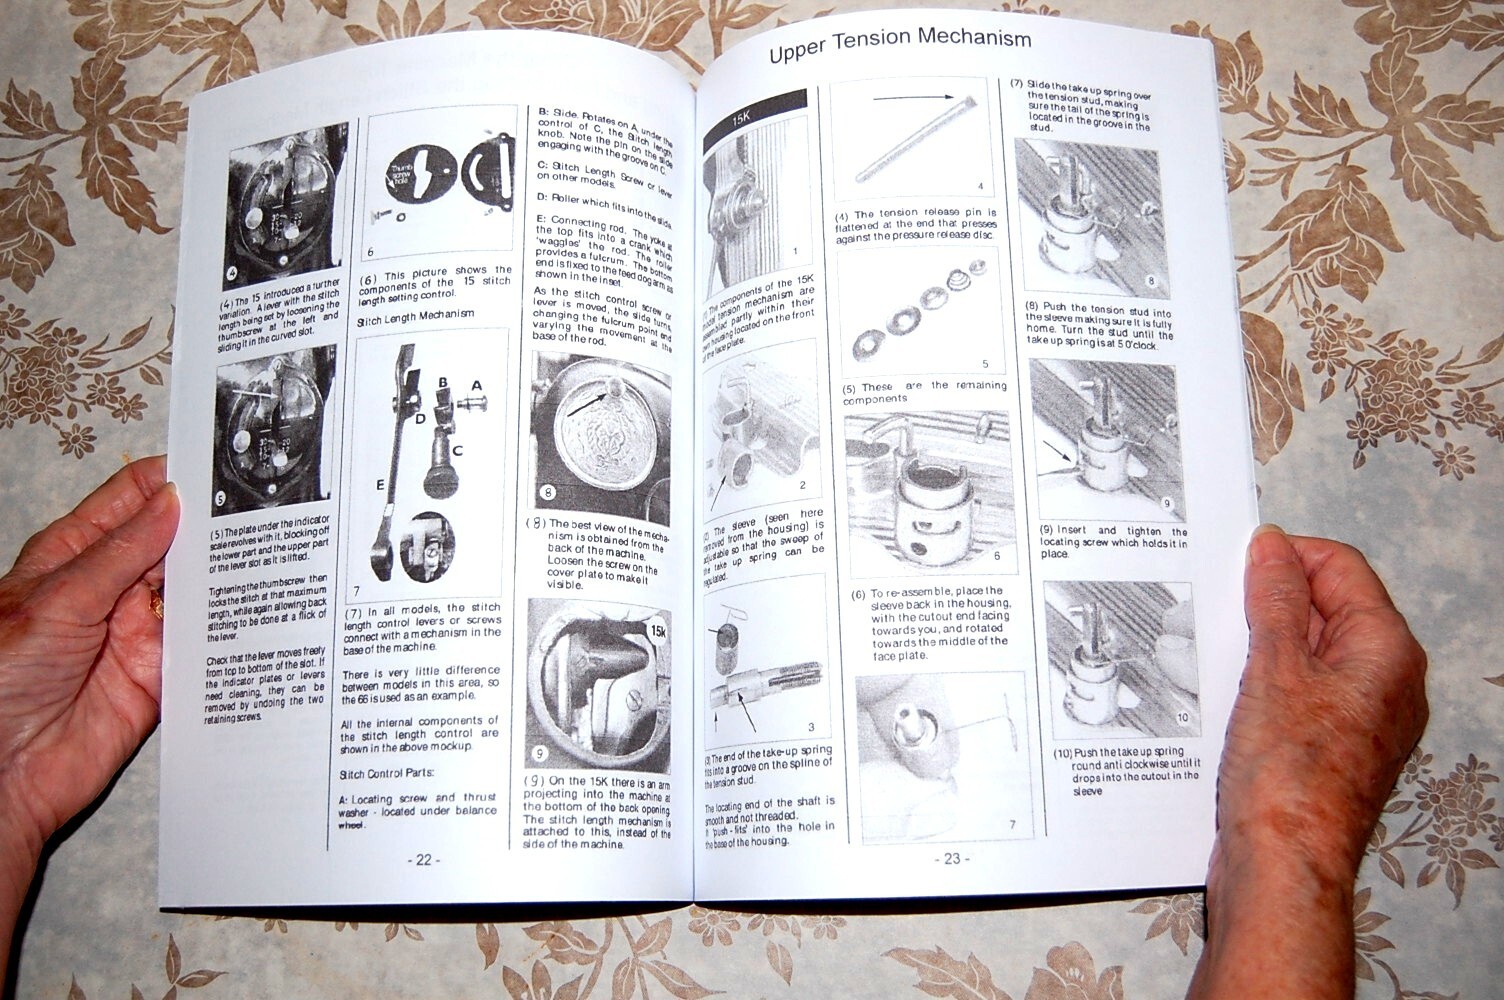
Stitch Length Regulator, Tension Mechanism
Oiling the Machine Top, Repairing and Refurbishing the Stitch Length Mechanism
Upper Tension Mechanism
The Machine Head
Removing, Cleaning and Resetting the Feed Dog and Other Lower Bobbin Parts
Timing the Machine, Adjusting the Needle Bar Height
Take-Up Arm Replacement
Underside Oiling
Checking, Adjusting and Replacing Parts Under the Machine Base
Checking and Adjusting the Pivots and Adjustable Connections
Sewing Test and Troubleshooting
Here are photos of some of the pages from the manual. You can see the superb quality of the print, photos and diagrams, and the quality of the paper itself.
How the Sewing Machine Works. (photo 03)

The Hand Wheel. (photo 04)

The Bobbin Winder. (photo 05)

Tension Mechanism. (photo 06)

Needle Height Adjustment. (photo 07)

Oiling. (photo 08)

Troubleshooting (photo 09)

These repair and refurbish instructions are fairly detailed and utilize illustrations to make it easy to understand and carry out the instructions. In most cases a simple tool, like a screwdriver, is needed to do the task. And, once you know what to do, you may be able to perform the timing or the adjustment in just a couple of minutes!
These Instructions are a
MUST
for every owner
of a
Singer Class 15 Machine!
*****************
Note for users of “Repair and Refurbish Manual for Singer Machines of Class 15”
Most people who use this manual also use additional manuals which include service information and parts illustrations that are directly applicable to machines of class 15. The additional manuals are:
1. “Adjusters Manual for Singer 15” (available at our eBay listing # 191046165148 )
2. “Illustrated Parts for Singer 15” (available at our eBay listing # 201494496344 )
To view any of these listings, simply type the item number in your eBay search line.
*****************