


Clamps right to US Beer Kegs!
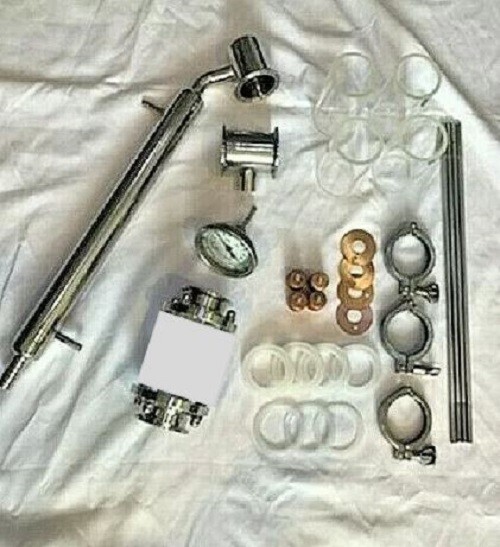
The Still Includes
- 4 section bubble plate column as pictured (Note: glass sections attach with a silicone gasket now, no stainless ring between them for a better seal and lower cost)
- Thermometer
- Stainless Tri-clamp thermometer tee section
- Stainless Steel Inline condenser
- All necessary gaskets and clamps (will clamp to a beer keg also!)
- 4 borosilicate glass sections, we also carry extra glass and all the spare parts if ever needed
- 3 thick silicone gaskets to go between glass to glass sections
- 2 thin silicone gaskets to go between glass and stainless end caps.
Product Details
- Light assembly required. No soldering needed. Super fun to use and easy to clean.
- 100% Food Grade 304 Stainless Steel and T2 lead free food grade copper.
- 2-piece reflux column / condenser that completely disassembles for easy storage.
- It's a highly efficient bubble plate column still.
- It can be used to distill ethanol (fuel alcohol), spirits (whiskey, Bourbon, vodka, gin, tequila, "moonshine," and more), and essential oils.
- Compatible with electric hot plates.
- Compatible with propane turkey fryers.
- Compatible with anything with 2 inch tri clamp
Items needed for assembling the four 2 inch glass column with copper bubble plates:
4* glasses
2* stainless steel flanges
4*copper bubble downcomers with caps
4*glass gaskets
4*stainless steel rods with nuts
Step 1
Put the copper bubble caps on the copper downcomers to get them connected together, and then put the complete copper bubble plates into the glass gaskets, the final part of this step is to put them on one of the flanges, as following: see picture for "step 1" in images above
Step 2
Put one of the glasses on the glass gasket that is put on the flange, then put the complete copper bubble plates into the glass gasket again and put them on the top of the first glass, as following: see picture for step 2 in images above.
Step 3
Repeat the Step 2( put the complete copper bubble plates into the glass gasket again and put them on the top of the next glass) till we use all the glasses. As following: See picture for Step 3 in images above.
Step 4
Put the flat gasket on the top of the final glass, and then put the rest flange on the top of the flat gasket.
Step 5
By using all the rods and nuts to get the column tight. That’s all.